How to photograph the aurora with your phone
You look up and see a faint grey glow. Someone's phone catches vivid green. Neither of you is wrong. This guide covers why that happens, the settings that get you the color, and how to check whether it's worth going out tonight.
By Skai · Updated 2026-08-10
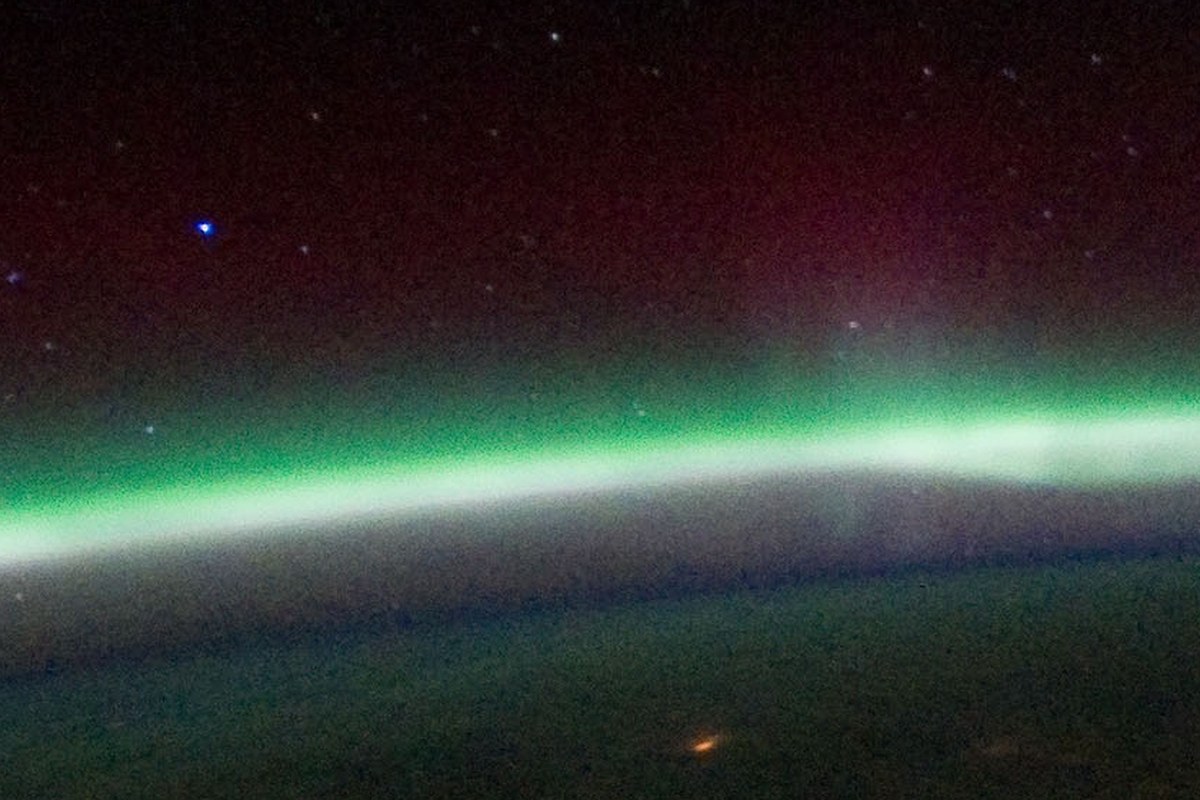
Photo: NASA/Expedition 29 crew, ISS
The aurora is one of the strangest things to photograph. The photo often looks nothing like what you just watched with your own eyes, and that gap is exactly what trips people up. No filter or AI trick is involved, and your phone isn't lying to you. The difference comes down to how your eyes work in the dark. Once that clicks, the settings are simple.
Why your eyes see grey and your camera sees green
Your eyes have two kinds of light-sensing cells: cones, which detect color but need decent light to work well, and rods, which are far more sensitive in the dark but essentially color-blind. In the low light of a night sky, your vision runs mostly on rods, so a faint aurora shows up to you as a pale grey or white glow, even though the actual light hitting your retina is green (or sometimes red or purple). A camera sensor doesn't have that biological ceiling: left open for several seconds, it keeps collecting photons the whole time, building up both brightness and color that your eyes only sampled a thin, colorless slice of. The photo simply accumulates what was already there.
Is the photo "more real" than what you saw?
Both are real, worth saying plainly without picking a side. The color genuinely exists at that wavelength; nothing is invented or painted in by software. Your eyes simply aren't built to register it well in dim conditions, the same way you can't see color clearly by moonlight even though the world isn't actually grey. There's one honest caveat, though: some published aurora photos get pushed hard in editing afterward, with saturation and contrast well beyond what the sensor actually captured, and that's a real gap worth being skeptical of. A plain, unedited long exposure showing more green than your eyes could pick out is a different case: a camera doing what a camera does.
Phone settings that actually work
iPhone: Night Mode should switch on by itself in low light (watch for the moon icon top-left of the shutter). Tap it, then drag the exposure slider. 5-10 seconds is usually enough handheld against something solid, and you can push toward 30 seconds if the phone is properly braced. Lock focus by tapping and holding on a distant light or a bright star before you start the exposure; autofocus hunts and fails in true darkness far more often than it looks like it should.
Samsung / Android: switch to Pro mode for direct control. Start around ISO 640-1600 and a 10-second shutter, and set white balance manually to daylight rather than auto. Auto white balance frequently overcorrects the aurora's green straight out of the shot. Keep flash off on every phone, every time: it only lights up whatever's a few meters in front of you, does nothing for the sky, and actively wrecks the camera's exposure metering.
Short exposures when the aurora is moving fast
A strong, active aurora can pulse, ripple, or shift shape over just a few seconds, and a long exposure blurs that motion into a flat, featureless smear instead of the structure you actually saw. If the display is moving quickly, drop the exposure down to roughly 3-5 seconds rather than pushing toward 10-30. You'll trade a little brightness for keeping the pillars, waves, or curtains recognizable instead of mushed together. On a slow, faint, mostly static glow, the longer exposure is fine and actually helps. On a fast, bright display, shorter is usually the better photo.
Brace it — this is the single most common failure
A multi-second exposure turns any hand shake into a visible blur, and this trips up more people than a wrong setting does. Rest the phone on something that isn't moving, a wall, a fence post, a car roof, a rock, or use a small tripod or clamp. Even a couple of seconds of handheld micro-shake is enough to smear a sharp aurora into a soft green haze with none of the structure left in it. If you can drop the ISO once the phone is properly braced, do it: a lower ISO with a longer, steady exposure gives cleaner color and less speckled noise than cranking ISO to compensate for a shaky handheld shot.
Get away from headlights and streetlights
Light pollution does the same damage to aurora photos that it does to meteor shots. A faint glow that would be obvious against a truly dark sky washes out fast against a nearby streetlight, porch light, or even passing headlights. A car's headlights sweeping across your framing during a long exposure can blow out the whole foreground in an instant. Pick a spot facing away from the brightest light source nearby, keep an eye out for traffic behind you, and if you're anywhere near a town, the difference a 20-30 minute drive into darker countryside makes is bigger than any setting on this page.
Will it show tonight? Check the forecast first
Before you head out, check a space-weather forecast rather than just a regular weather app. The number to look for is the Kp index, a 0-9 scale estimating how strong geomagnetic activity is. Roughly, the higher the Kp, the further from the poles the aurora is likely to be visible that night. NOAA's Space Weather Prediction Center (SWPC) publishes a free Kp forecast and an aurora visibility map, and most dedicated aurora-tracking apps pull from the same underlying data with the convenience of a push alert when activity picks up. A good Kp forecast is necessary but not sufficient. Pair it with an actual clear-sky check and low light pollution for your location, since a promising Kp number under solid cloud cover, or from the middle of a lit-up town, still won't get you much of a photo.
What your phone can really get
Set expectations honestly, because they vary a lot by how active the aurora actually is. On a clear night with a solid Kp forecast, dark skies, and the phone properly braced, you can realistically get real color: green, sometimes a hint of red or purple at the edges, along with visible structure such as bands, pillars, or a soft curtain shape rather than a flat glow. That's a genuinely satisfying phone photo, and it often shows more color than your eyes could isolate in the moment, for the biological reasons above.
What a phone won't reliably get is a faint, borderline display, the kind right at the edge of visibility, where even a dedicated camera with a fast lens and higher ISO struggles to pull out clean color without heavy noise. On those nights a phone photo may come back looking like a grey-green smudge rather than the vivid curtain in someone else's shared photo from a stronger night. That comes down to the actual strength of the display that night, not a settings failure, and no amount of exposure dragging changes what wasn't there to capture.
Not sure what went wrong?
Send the shots you already took, phone or camera, and find out what's holding the image back — free, no signup.
Get your free diagnosisRuns in your browser — nothing uploaded.