How to photograph the Andromeda Galaxy
Point a phone, a DSLR on a tripod, or a beginner smart telescope at it, and your first honest result will be a small grey oval. It won't look like the swirling blue-and-gold spiral from the reference photos, and that's not a mistake. Here's the timing, the setup, and why the color only shows up later.
By Skai · Updated 2026-08-11
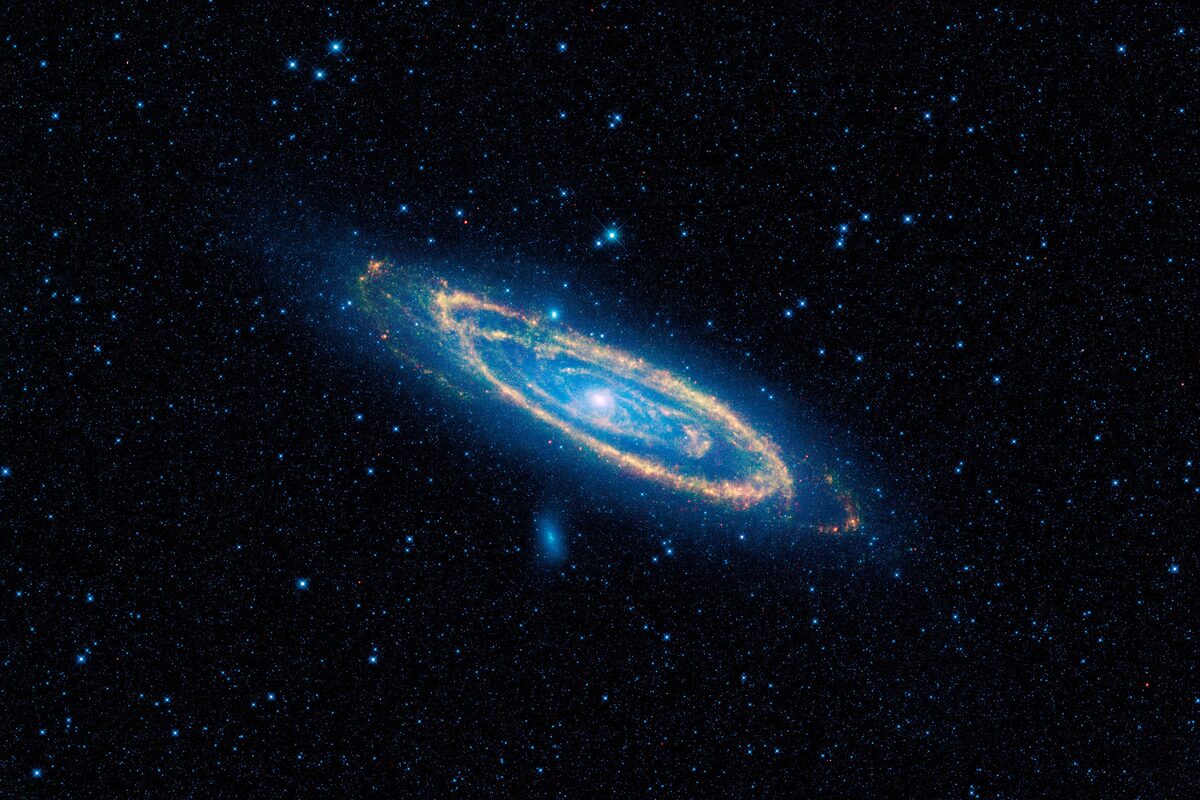
Photo: NASA/JPL-Caltech/UCLA (WISE)
Andromeda (M31) is the closest large galaxy to ours, and on a clear night away from city glare it's one of the few galaxies you can pick out with your own eyes. It's also one of the most reliably disappointing first astrophotography targets, because everyone's mental reference is a stacked, stretched, hours-of-exposure image. That's not what one frame, or even one night, realistically gets you. Get the timing and expectations right first, and the technique below will make a lot more sense.
When to actually look
At mid-northern latitudes (around 55°N, Lithuania and similar) Andromeda never fully sets. It sits close to the pole and is up somewhere in the sky most of the year, but "up" and "usefully high" aren't the same thing. In mid-August it only clears the murk near the horizon well after midnight, so an early-evening session this month will mostly find it low and washed out. The easy window opens in late September through mid-October: by then M31 is visible low in the east at nightfall, swings high overhead around midnight, and is still well placed in the west toward dawn. That's usable for most of the night, not a narrow slot. If you're reading this in August, either plan a very late session or hold off a few weeks. There's no fix for altitude except patience.
To find it, locate the Great Square of Pegasus, then the "W" shape of Cassiopeia. Andromeda sits roughly between them, as a faint, slightly elongated smudge to the naked eye under a dark sky. Under real light pollution it can look like an ordinary dim star at first glance; the giveaway is that it's fuzzy at the edges rather than a sharp point.
Set the expectation now: it's a grey smudge, and that's correct
Through binoculars or a small telescope, what you're actually seeing is only Andromeda's bright central core. The faint outer spiral arms are far too dim for your eye to pick up in real time. Your eye's low-light vision also can't register color at that brightness, so even the core reads as a flat grey-white oval instead of the blue-and-gold spiral you've seen in photos. This is normal, not a sign anything is wrong with your gear. The color and structure in every reference image came from a camera stacking and stretching many minutes to hours of exposure. Nothing shows that live at the eyepiece, ever.
The same honesty applies to a phone. Andromeda's light is spread thin across a genuinely large patch of sky (about six times the apparent width of the full moon) at very low surface brightness. That combination is close to the worst case for a phone's small sensor and short exposure. On a braced tripod with a dedicated night/astro mode, under a dark sky, you might pull out a faint smudge; handheld, or under typical suburban light pollution, expect nothing recognizable. A phone is genuinely the wrong tool to lead with here. A DSLR on a tripod or a beginner smart telescope will get you a real result far sooner.
Manual focus, always — autofocus can't find stars
If you're using a DSLR or mirrorless camera, switch to manual focus before you do anything else. Stars are too small and dim for autofocus to lock onto, and turning the lens ring to the infinity mark isn't reliable enough on its own: infinity often drifts slightly with temperature or a given lens copy. Instead, point at the brightest star you can find, zoom in as far as Live View allows, and adjust manually until that star shrinks to the smallest, sharpest point you can get rather than a soft blob or a donut shape. Some people tape the focus ring down afterward, since a bump or a temperature swing partway through a session can knock it back out without you noticing until you review the frames.
The 500 rule ceiling — and why a static tripod hits a wall
On an untracked tripod, the Earth's rotation limits how long a single exposure can run before stars smear into short trails. The rough guide is the "500 rule": 500 ÷ your lens's focal length in millimeters gives the max seconds before trailing becomes visible: a 135mm lens tops out around 3.7 seconds, a 50mm lens around 10. That's nowhere near enough single-frame exposure to register Andromeda's faint outer arms, which is exactly why a plain tripod-and-DSLR setup can't produce a detailed shot no matter how well everything else is dialed in. A star tracker that follows the sky's rotation removes this ceiling entirely, but even without one, stacking (next section) is what makes a tripod-only setup viable at all. One more beginner trap worth naming: even a fairly sturdy tripod will blur exposures in a light breeze, so shelter your setup if you can.
Why one photo is never enough
Real Andromeda images, the ones the reference photos are made from, are built from dozens to hundreds of individual exposures of the same framing, combined afterward so the real signal from the galaxy reinforces itself while the random noise in each frame cancels out. It's a scale thing: one well-known amateur result of Andromeda was built from 227 separate two-minute exposures. You don't need anywhere near that many for a first result, but the principle holds at any scale: shoot more frames than feels necessary, because a single exposure, however sharp and well composed, won't show the structure you're after on its own. That's what a stacking pipeline, ours or any other, is actually doing with your frames: pulling consistent signal out of a pile of individually noisy shots. It cleans up noise and trailing, but it won't turn one phone snapshot into a magazine-cover galaxy.
Light pollution fights you before detail ever shows up
Under a brighter (higher-Bortle-scale) sky, a long exposure fills up with sky glow before Andromeda's faint structure has a chance to register. The fix is shorter individual exposures plus more stacking, not longer single shots. If you're shooting from anywhere with real light pollution, a broadband light-pollution filter, something like an Optolong L-Pro, genuinely helps on a galaxy target like this. Worth knowing specifically: narrowband filters, the usual advice for nebulae, do not help with galaxies. That mix-up trips up a lot of beginners moving from one target type to the other.
Smart telescopes: great start, but check the field of view
A beginner smart telescope like the Seestar S50 or Dwarf 3 handles focus and tracking for you and is a genuinely easier on-ramp than a manual DSLR rig. The catch worth knowing before your first session: the Seestar S50 images roughly a 1.3-degree window, while Andromeda spans about 3 degrees end to end, noticeably bigger than the frame. Left in the default single-frame mode, you'll get a nicely detailed slice of the core rather than the whole galaxy, and it's easy to assume something's wrong when it's really just a field-of-view mismatch. Turn on the app's mosaic/framing mode to stitch several panels together into the full extent, and budget real time for it: a mosaic session at typical sub-exposure lengths can run a few hours rather than minutes.
Not sure what went wrong?
Send the shots you already took (phone, DSLR, or smart telescope) and find out what's holding the image back — free, no signup.
Get your free diagnosisRuns in your browser — nothing uploaded.